
Ancestor Map Builder 2.0
Now YOU can build your own ancestor map!

Often one fun and exciting idea leads to another idea that is even more fun and exciting! That’s why I’m writing another map article just one day after introducing a tool that I created using Claude Code.
Yesterday’s article about creating a map for my own ancestors is here.
I was pleased with this new tool that took a list of my ancestors and plotted their birthplaces on a map, showing my family tree expand over a span of over 250 years. And then I started realizing that other people might want to try this, too. How could I make this tool more versatile so that anyone could input their own ancestors? I asked Claude if this was possible, and of course he said, “Sure it is!”
A few hours later, and it works! Try it out for yourself at webjmd.com/mymapbuilder on my website. Below is a screenshot of the initial view.
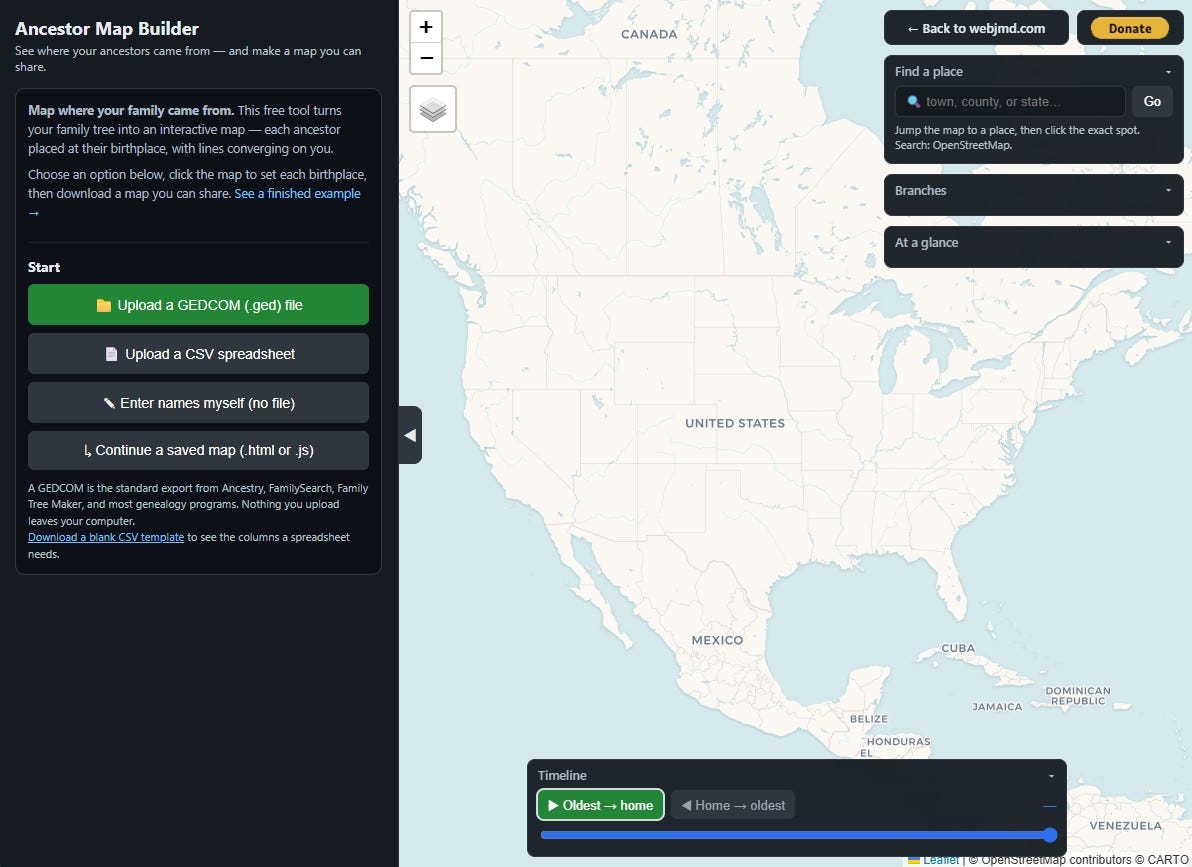
To get started, click one of the four options at the left to enter your ancestors.
Upload a gedcom file of your family tree. This is the fastest way to enter your data since it already has names and dates. I had a gedcom file that I maintain in Family Tree Maker.
Upload a .csv file that includes some or all of your ancestor names, birth years, birth places, and latitude and longitude of their birth places. Any information that you don’t have — especially GPS coordinates — can be added in the next step.
Manually enter names, dates, and other information. This is the simplest, and it works for everyone.
Or, continue by uploading a previously saved map from this site.
For this example, I clicked “Enter names myself”, and that opened a list where you can start adding names. The yellow arrow below shows where I entered my name as the “home” person. Then, click the map pin (highlighted by the yellow circle) to select a place on the map where the person was born. If you click the wrong place, just re-click the pin and select another place on the map.
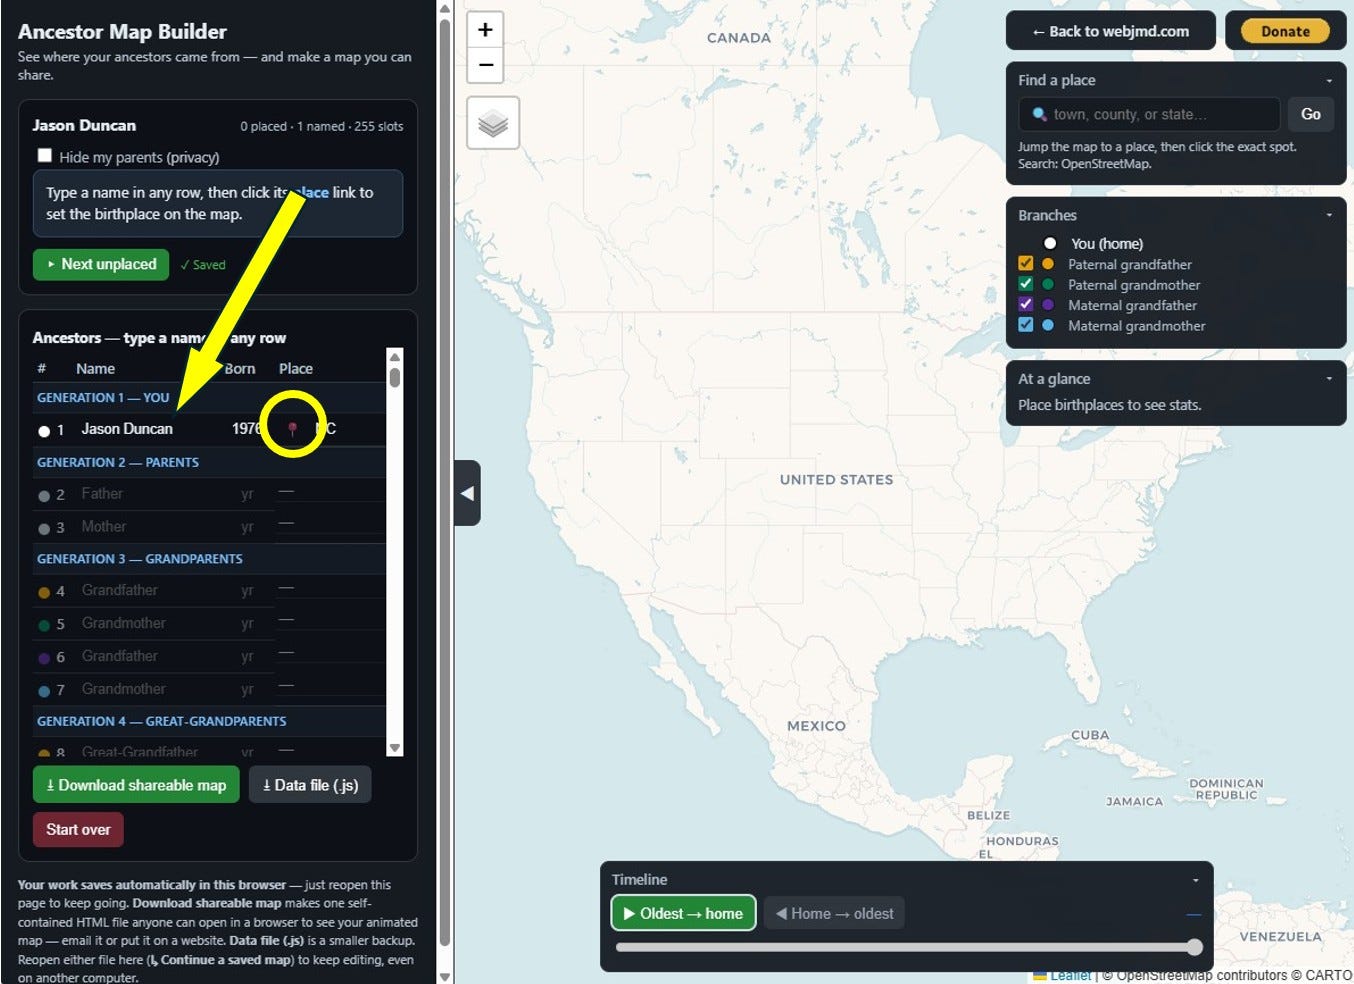
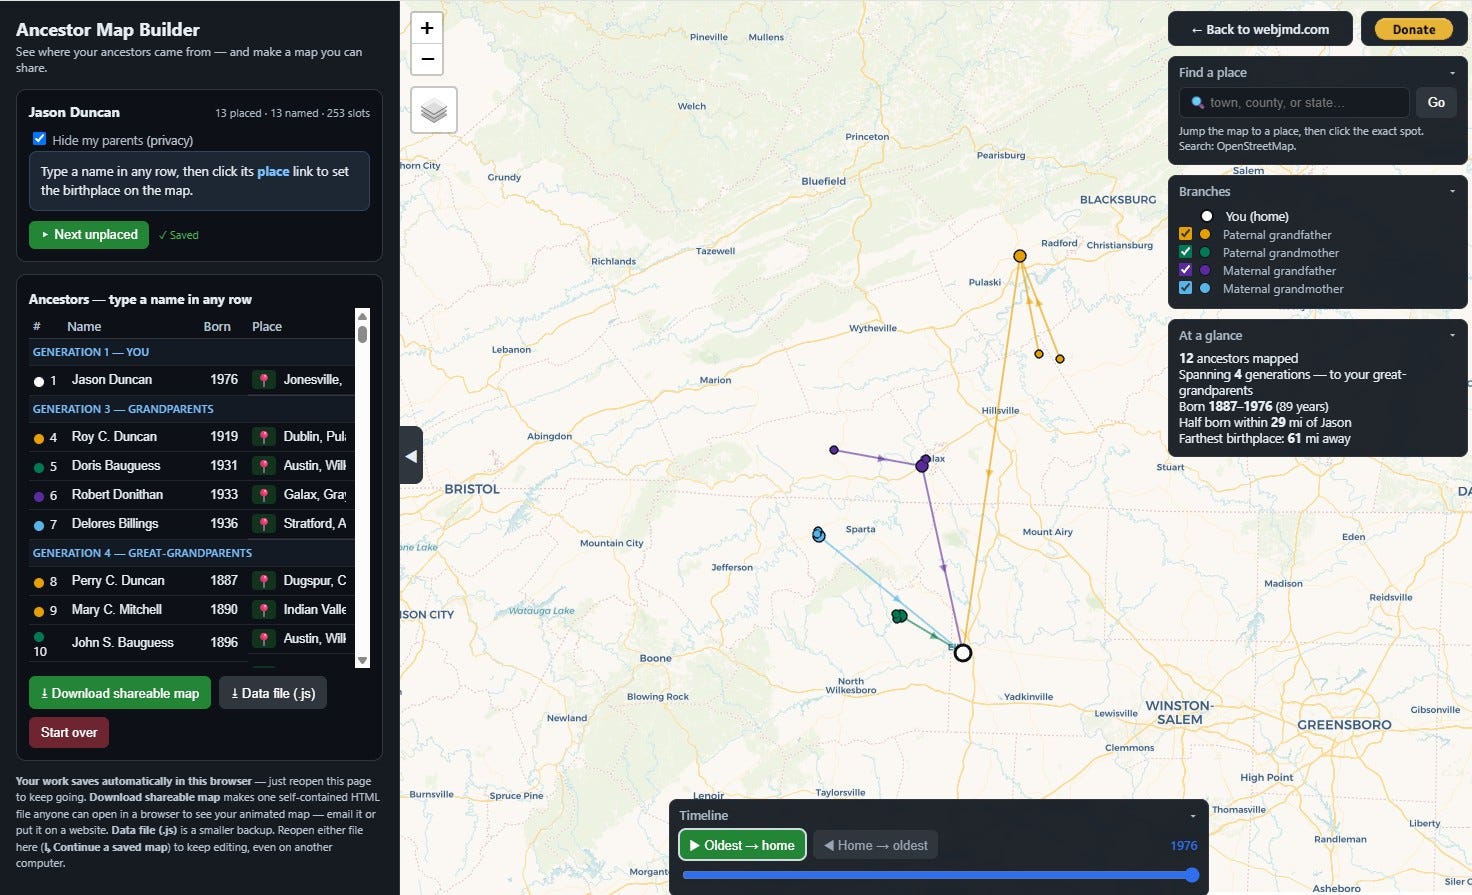
You can select the place location for each name as you enter it, or you can enter several names and click the points all at once. Optionally, you can also type a place name (I entered “NC” in the example above), but this is only text and does not affect the point location. As you enter names and assign them GPS coordinates on the map, you’ll start to see your map take shape. Below, I have entered grandparents and great grandparents. Each grandparent group is a different color line.
If I keep going by adding all of the ancestors that I know through 5th great grandparents and assigning their birth locations using the map, I end up with many more points.
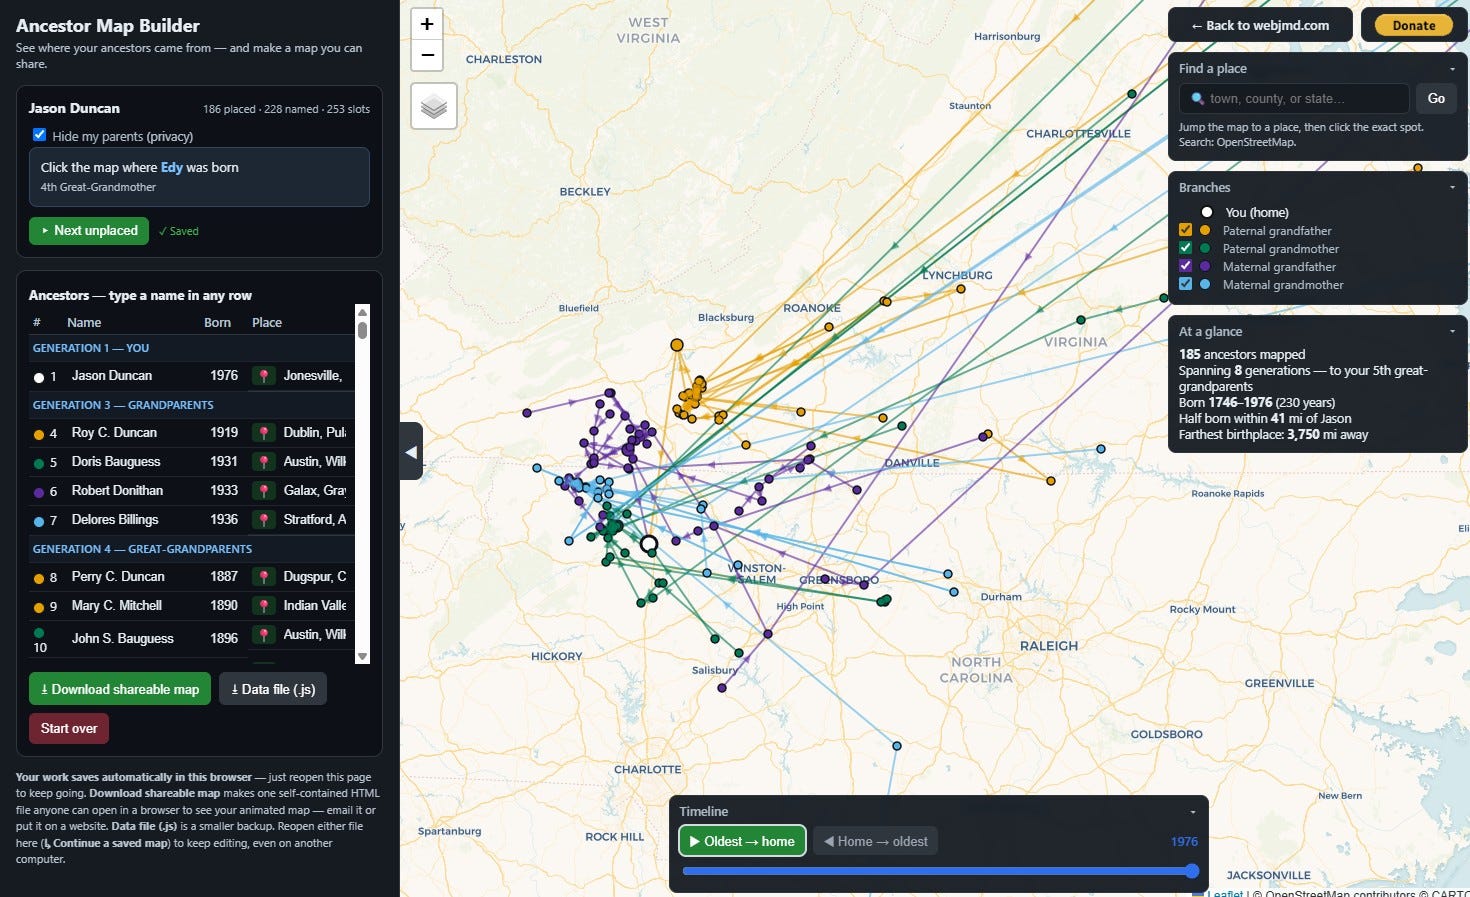
Use the toggles (at right) to turn on/off any one of your grandparent’s set of ancestors. This is useful to reduce the clutter and track one particular quarter of your family tree.
Clicking on any of the points reveals the name of the ancestor, their relation to you, their birth year, and birth place.
The timeline at the bottom of the page can be run forward (the oldest ancestor to you) or backwards (you back to your oldest ancestor).
If you need to find a particular town or county, type it in the “Find a place” box at upper right to have the map zoom to that area when you need to click to assign a point to an ancestor.
At any point, you can save your work! Near the bottom left, “Download shareable map” saves your work to an html file on your computer. This serves two purposes.
The file is on your computer, and the next time you want to add something to it, you return to the builder page, and select “Continue a saved map”. You just select that html file from your computer, and the map loads exactly where you previously stopped.
The file also serves as a fully working map. When you open that file, it will open in your browser allowing you to show/hide different branches and activate the timeline. You can also send the file to friends or family so they can view it as well.
As long as you have your saved file, you can always re-upload it to the builder page to make changes or add to it. The other download button “Date file (.js)” saves only the names, dates, places, and GPS coordinates that you entered. It can also be used as an initial upload file. But if you have the map file (.html) then you really don’t need the data (.js) file by itself.
To start another set of ancestors or to start over with data entry, click the “Start Over” button at bottom left.
An info box near the upper left shows what action will be taken when you click on the map. Usually, this tells you who the highlighted person is in your list and that clicking the map will assign a location to that person.
At right, the “At a glance” panel shows facts about the data that you have entered.
I’ve tested this out, and I don’t see any issues, but I’m sure others will find something that isn’t working quite right. I’m sure there will need to be tweaks to make it more user-friendly. If you see something or have a suggestion, let me know. You can leave a comment or send me an email.
I can't wait to give this a try. Thank you Jason
Thank you! I will check it out. I learned of your post from Steve Little on LinkedIn. P.S. Should I use current place names in the US? I've been converting all my place names to what they were, say, in the 1700s. e.g., Surry County, Colony of Virginia, British America or Mobile, French Louisiana.